A sudden, throbbing toothache or a chipped tooth during dinner can turn a calm evening into a frantic search for help. For families in Surprise, Sun City, and Peoria, these moments happen more often than you might think, leaving parents scrambling for a solution.
Most online articles give vague advice like “call your dentist.” They often skip the most important part: what to do in the first few minutes before you can get professional help. They don’t give you a clear, simple plan to manage pain, prevent more damage, and stay in control. This is where being prepared makes all the difference.
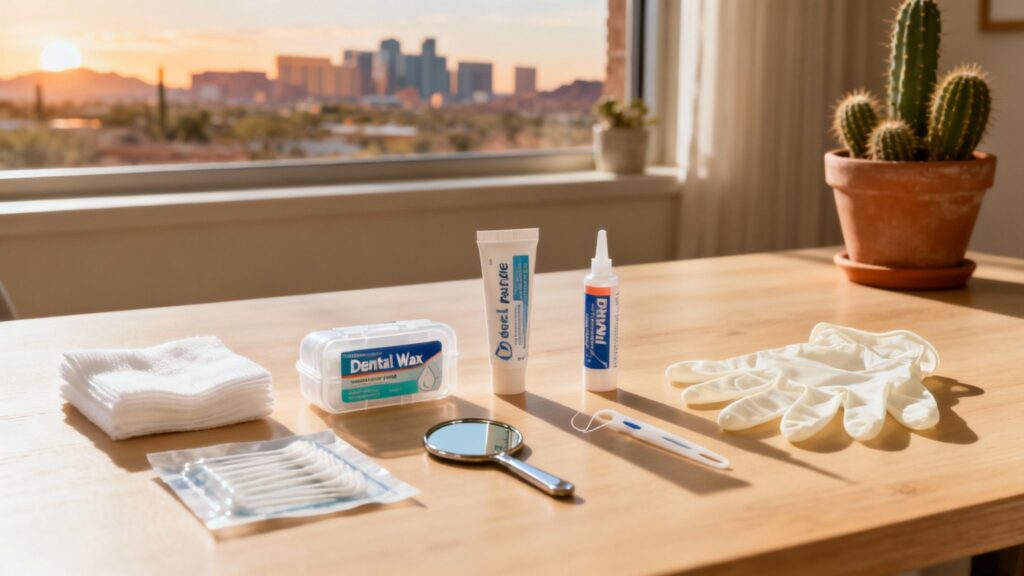
This guide goes beyond the basics to give local families the ultimate resource. We’ve created the final dental emergency checklist every Surprise family should have on hand. It tells you exactly what you need, why it’s important, and how to use it. By following this list, you can handle any dental crisis with confidence. With same-day emergency appointments at West Bell Dental Care, this checklist is your first step toward getting fast relief.
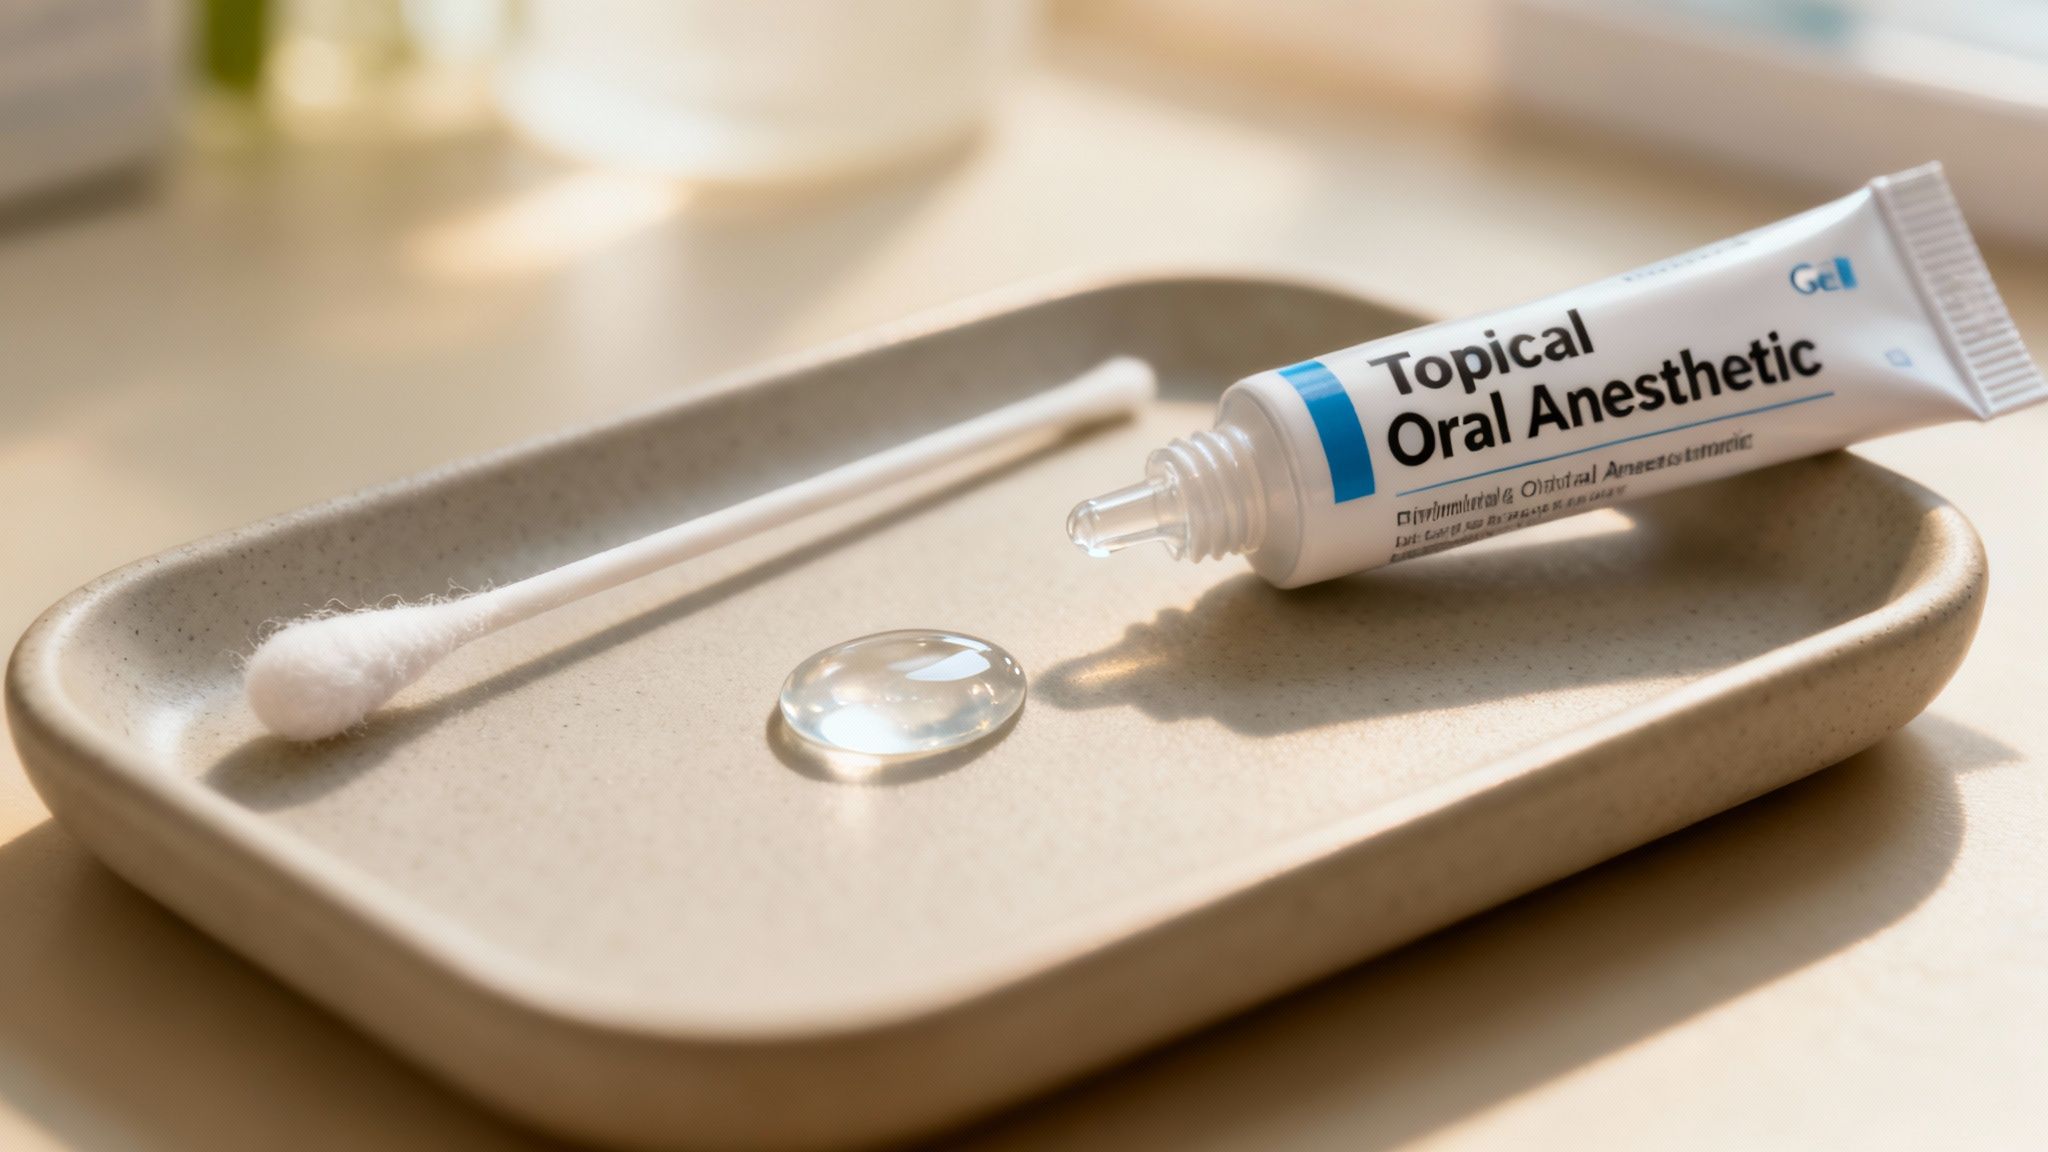
1. Topical Oral Anesthetic (Benzocaine 20%)
When a sudden, sharp toothache hits a family member in the middle of the night, having a way to provide quick, temporary relief is a lifesaver. A topical oral anesthetic, like one with 20% benzocaine, is a must-have for the dental emergency checklist every Surprise family should have on hand. This gel or liquid numbs the area by blocking nerve signals, easing pain from an injury or a bad toothache while you arrange for professional care.
This type of product is used in emergency rooms and dental offices because it works fast. Brands like Orajel and Anbesol are easy to find and can safely manage discomfort at home. Its main job is to help you get through the time between when an injury happens and when you can get to our office.
How to Use It Correctly
Using an oral anesthetic the right way makes it safer and more effective. Always follow the package instructions, but here are some key tips for families in Surprise, AZ:
- Apply Carefully: Use a clean cotton swab to apply a small amount of the gel directly to the sore tooth and the gums around it. Avoid using your fingers, which can spread germs.
- Follow the Schedule: Most products can be used every few hours. Stick to the schedule to avoid using too much while still getting pain relief.
- Store It Properly: Keep the product in a cool, dry place like a medicine cabinet to keep it working well.
- Check the Date: Like all medical supplies, benzocaine expires. Check the date every six months and replace it if needed.
Key Insight: Topical anesthetic is a temporary fix, not a cure. It’s meant to make a dental emergency more bearable until you can see a dentist. Ongoing pain could be a sign of a serious problem, like an infection. To learn more about what causes these issues, you can read about tooth sensitivity on our blog.
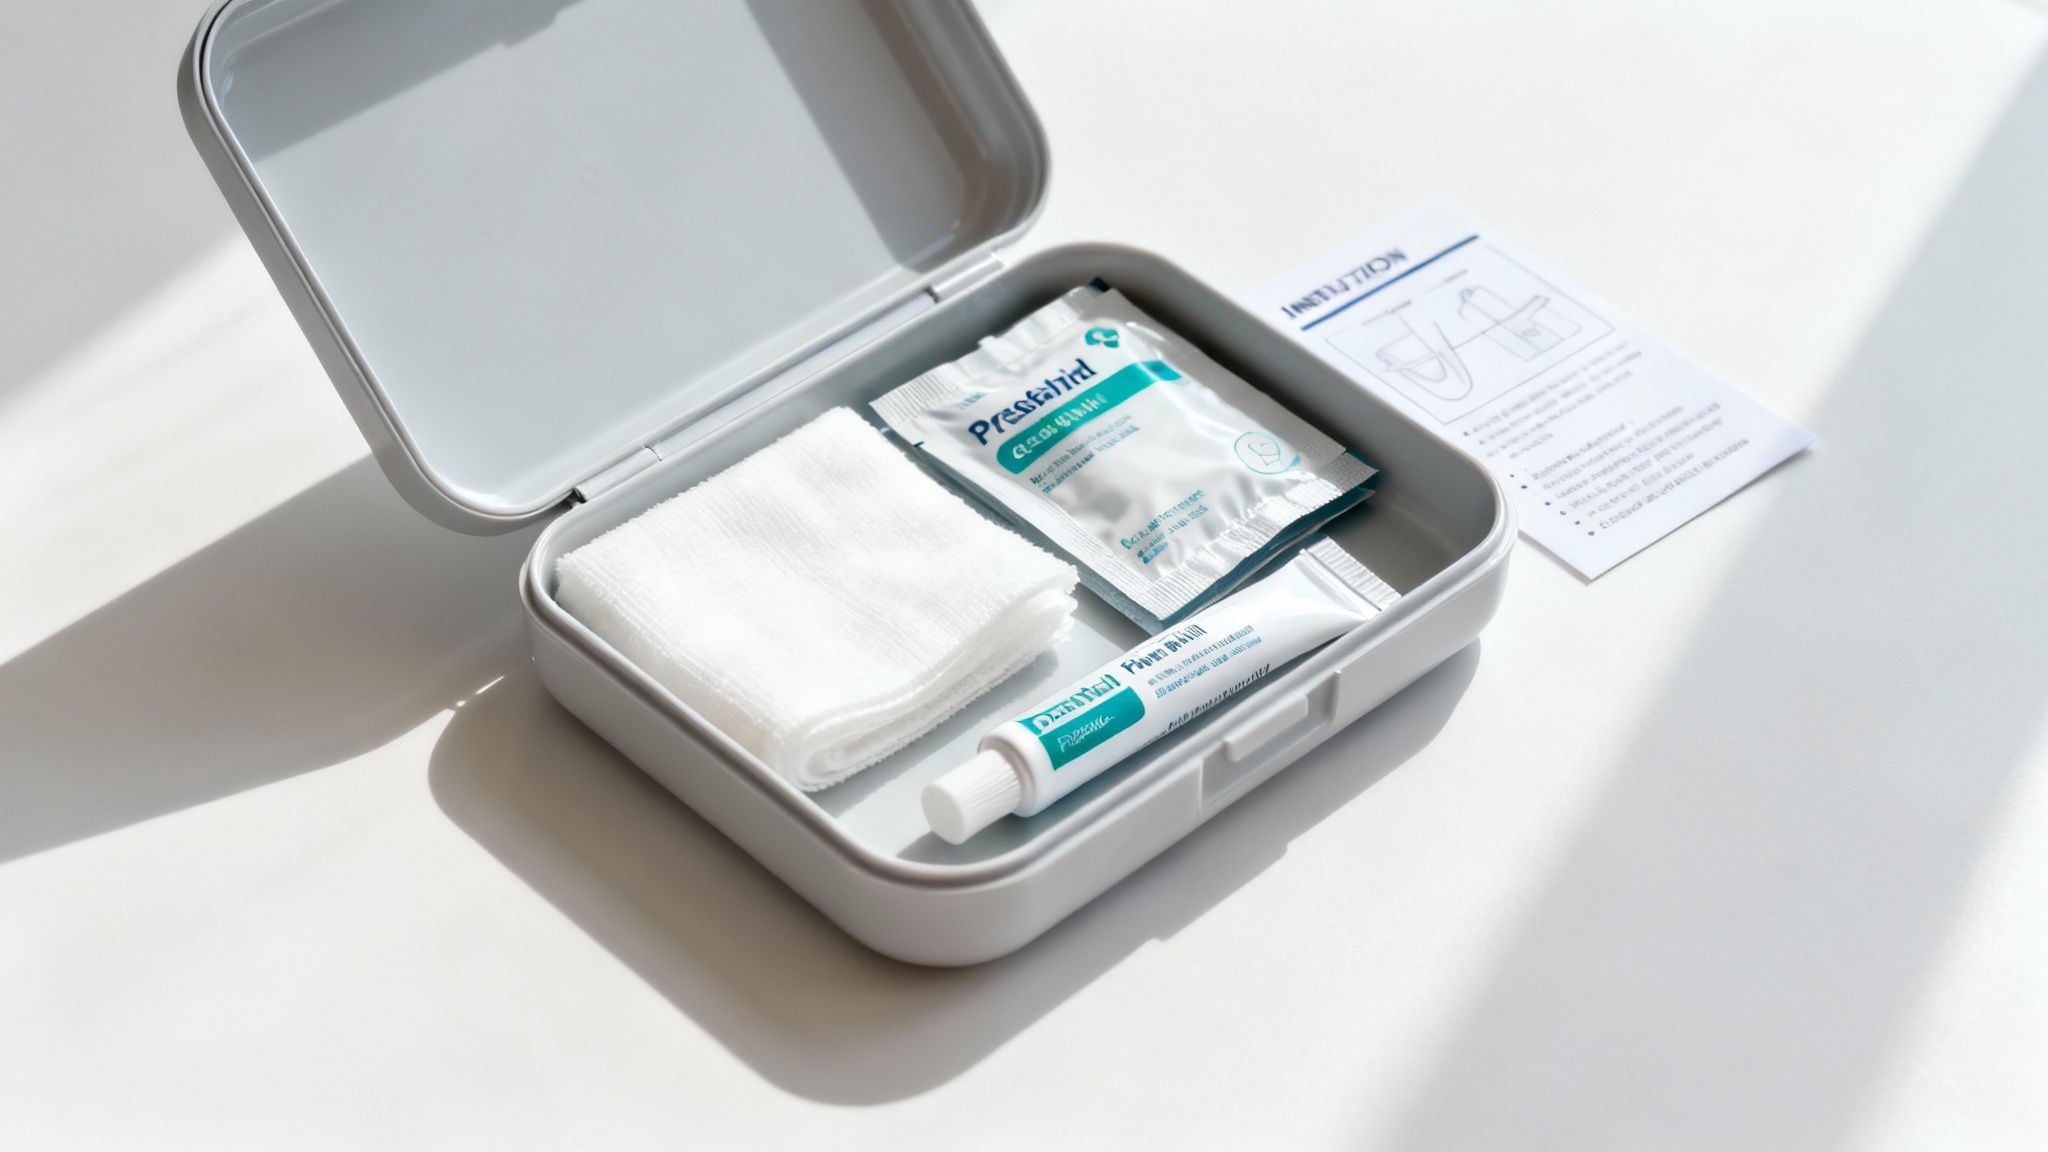
2. Dental First Aid Kit (Pre-assembled Emergency Kit)
When a dental emergency happens, you don’t want to be scrambling to find gauze, pain relievers, or temporary filling material. A pre-made dental first aid kit has everything you need in one organized box. This is a vital part of the dental emergency checklist every Surprise family should have on hand, helping you act quickly to manage pain and prevent more damage.
These kits are designed to handle common problems like a lost filling, a chipped tooth, or cuts in the mouth. Having one means you are ready to stabilize the situation until you can reach our office. It gives you peace of mind knowing you have the right tools when every second counts.
How to Use It Correctly
A pre-made kit is a great start, but knowing how to use it and where to keep it is what really prepares your family. Here are some tips for our patients in Surprise, AZ:
- Keep It Accessible: Store your dental first aid kit in a central spot like the main bathroom or kitchen. Think about keeping a second one in your car for emergencies on the go.
- Show Your Family: Go over the kit’s contents with older children and other adults in your home. Everyone should know where it is and what’s inside.
- Check and Replace: Set a reminder to check the kit every six months. Replace any used items and check the expiration dates on things like pain relievers.
- Add Your Dentist’s Info: Use a permanent marker to write West Bell Dental Care’s phone number on the outside of the kit so it’s easy to find in a stressful moment.
Key Insight: A dental first aid kit is a key part of being prepared. Just like new parents think through everything when creating a comprehensive diaper bag checklist, having a dental kit is about planning for needs before they happen. It’s a small step that makes a huge difference.
3. Sterile Gauze Pads and Hemostatic Agents
When a dental injury causes bleeding, like from a knocked-out tooth or a deep cut, controlling it quickly is the top priority. Sterile gauze pads are a basic part of the dental emergency checklist every Surprise family should have on hand. They are much better than tissues or paper towels, which can fall apart and leave fibers in the wound.
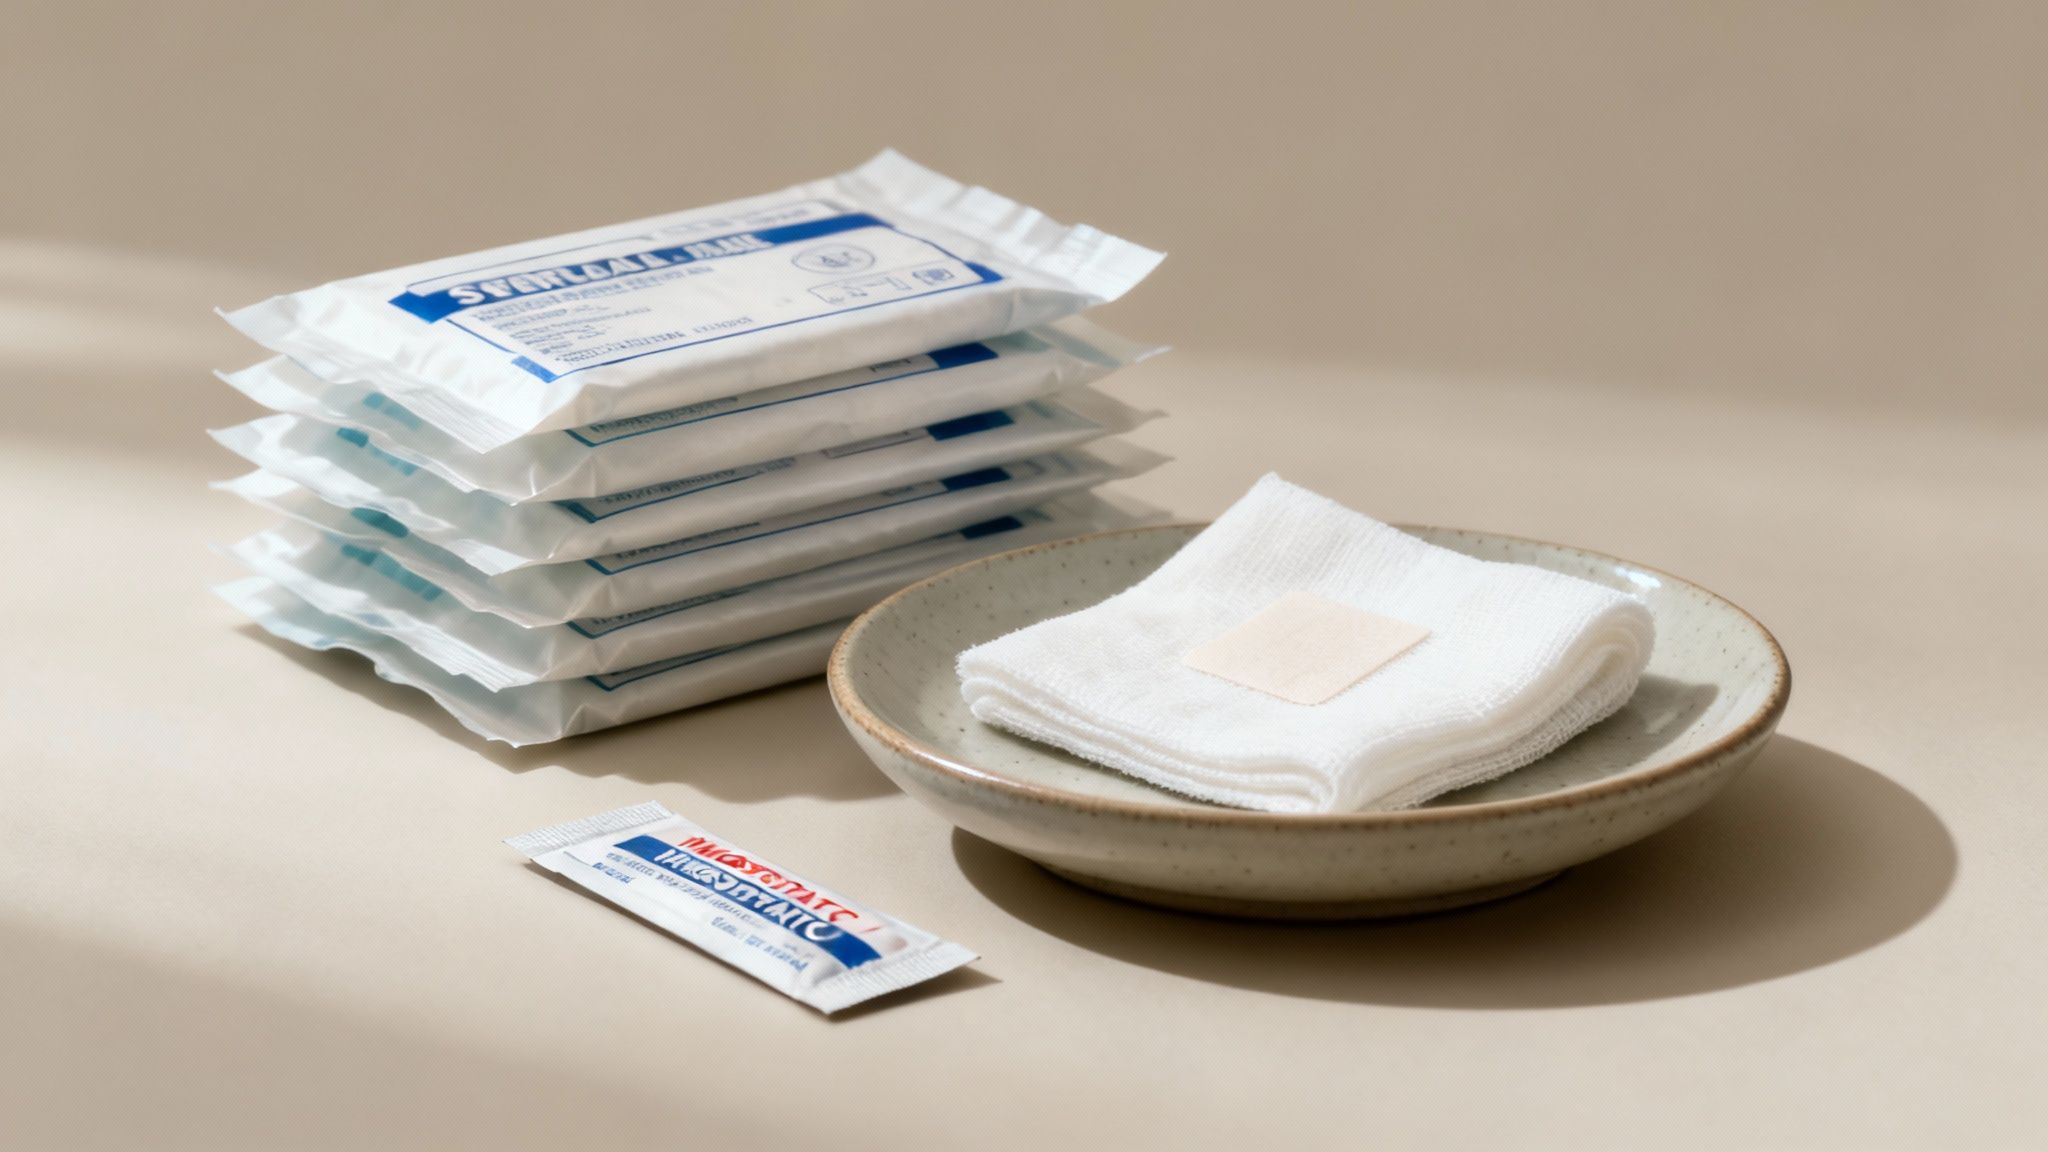
These materials are used in emergency rooms and dental practices because they are made to absorb blood and help clots form safely. Having these items on hand helps you stay calm and manage the situation until you can get professional care at our office.
How to Use It Correctly
Using gauze correctly is important for stopping bleeding without causing more harm. Here are tips for families in Surprise, AZ, during a dental emergency:
- Apply Firm, Steady Pressure: Fold a clean gauze pad into a small, thick square and place it over the bleeding area. Have the person bite down or use your fingers to apply firm pressure for at least 15-20 minutes.
- Don’t Disturb the Clot: Try not to keep checking the wound or changing the gauze. This can break the new clot and make the bleeding start again.
- Moisten Before Removing: If you need to replace the gauze, wet it a little with clean water first. This stops the pad from sticking to the wound and pulling the clot away.
- Keep Your Kit Stocked: Store extra gauze pads in a sealed, waterproof bag in your emergency kit to keep them sterile.
Key Insight: The main goal after a dental injury is to control bleeding and protect the wound. A blood clot is like a natural bandage. For more advice on care after a procedure, you can read about what not to do after tooth extraction on our blog.
4. Over-the-Counter Pain Relievers (Ibuprofen and Acetaminophen)
When a throbbing toothache or swelling from a dental injury starts, managing the pain is the first thing to do. Over-the-counter pain relievers like ibuprofen and acetaminophen are necessary for the dental emergency checklist every Surprise family should have on hand. These medicines work to reduce pain and, for ibuprofen, swelling, giving you relief until you can see a dentist.
Ibuprofen (like Advil) is an anti-inflammatory, so it works well for dental problems with swelling, like a gum injury. Acetaminophen (like Tylenol) targets pain signals in the brain and is a good choice for people who can’t take ibuprofen. Having both lets you manage different kinds of discomfort safely.
How to Use It Correctly
Using these medicines correctly is key to managing pain while you wait for your appointment. Always read the label, but here are some guidelines for families in Surprise, AZ:
- Alternate for Better Relief: For bad pain, dentists often suggest alternating between ibuprofen and acetaminophen. You can take a dose of ibuprofen, then a dose of acetaminophen three hours later, for more consistent relief.
- Take with Food: Ibuprofen can bother your stomach. Always take it with a small meal or a glass of milk to reduce this risk.
- Follow the Dosage: Never take more than the maximum daily dose listed on the package. This is usually 3200mg for ibuprofen and 3000mg for acetaminophen for adults.
- Store Safely: Keep medicines in their original containers, away from moisture and out of reach of children.
- Check Expiration Dates: Pain relievers get less effective over time. Check the dates every six months and replace any expired bottles.
Key Insight: While over-the-counter pain relievers are great for managing symptoms, they don’t fix the real problem. An infection, cavity, or nerve damage needs to be diagnosed and treated by a dentist. Waiting too long can lead to bigger problems.
5. Temporary Dental Filling Material (Zinc Oxide Eugenol and Alternatives)
When a filling falls out or a tooth chips, the inside of the tooth is exposed and can be very sensitive. Temporary dental filling material is a key part of the dental emergency checklist every Surprise family should have on hand. This paste creates a temporary seal over the damaged area, protecting it from food, germs, and temperature changes that cause sharp pain.
Products like Dentemp or Temparin can be found at most local drugstores and are safe for at-home use. They provide quick relief and prevent more damage while you wait for a dental appointment. This simple step can turn a painful, stressful situation into one you can manage.
How to Use It Correctly
Applying this material correctly is important for creating a good temporary seal. Always read the instructions, but here are some tips for Surprise families:
- Clean and Dry First: Gently rinse the area with warm water and pat it dry with sterile gauze. The material sticks best to a clean, dry surface.
- Fill the Space: Use the small applicator to carefully press the paste into the cavity or chipped area until it’s full. Don’t overfill it.
- Let It Set: Close your mouth and bite down gently a few times to help the filling fit your bite. Don’t eat on that side for at least 5-15 minutes to let it harden.
- Be Gentle: While the temporary filling is in place, avoid chewing hard or sticky foods on that side of your mouth to keep it from coming out.
Key Insight: A temporary filling is just that—temporary. It’s meant to protect your tooth for a few days at most. You must see a dentist within 48-72 hours to prevent infection or more damage. To learn how a dentist permanently fixes these problems, you can read about restorative dentistry on our blog.
6. Saline Solution and Oral Rinse
When a dental injury involves a cut or a knocked-out tooth, keeping the area clean is the first step to prevent infection. A sterile saline solution or an antibacterial oral rinse is a vital part of the dental emergency checklist every Surprise family should have on hand. Rinsing gently with a salt-water solution helps remove dirt, reduces germs, and soothes sore tissues.
This simple step is a standard instruction after oral surgery and in emergency medicine because it’s effective and easy. Whether you use a pre-made sterile saline or a simple homemade solution, it helps manage the injury and prevent problems.
How to Use It Correctly
Using a saline rinse correctly can help the healing process and provide comfort. Always be gentle, especially around an open wound.
- Prepare Your Rinse: You can buy pre-made sterile saline or make your own by dissolving 1/2 teaspoon of salt in 8 ounces of warm water.
- Rinse Gently: Swish the solution in your mouth for about 30 seconds, focusing on the injured area, then carefully spit it out. Don’t gargle too hard, as it could knock out a blood clot.
- Time It Right: Rinse after meals to clear food out of the wound. Rinsing 3-4 times a day is usually best for the first few days after an injury.
- Store It Properly: Keep pre-made solutions in a cool, dry place and check the expiration date. Throw away any homemade solution after 24 hours.
Key Insight: A saline rinse is an important first-aid step, but it doesn’t replace professional dental care. Its main job is to keep your mouth clean and lower the risk of infection after an injury. For tips on other products for your daily routine, learn more about the best oral hygiene products on our blog.
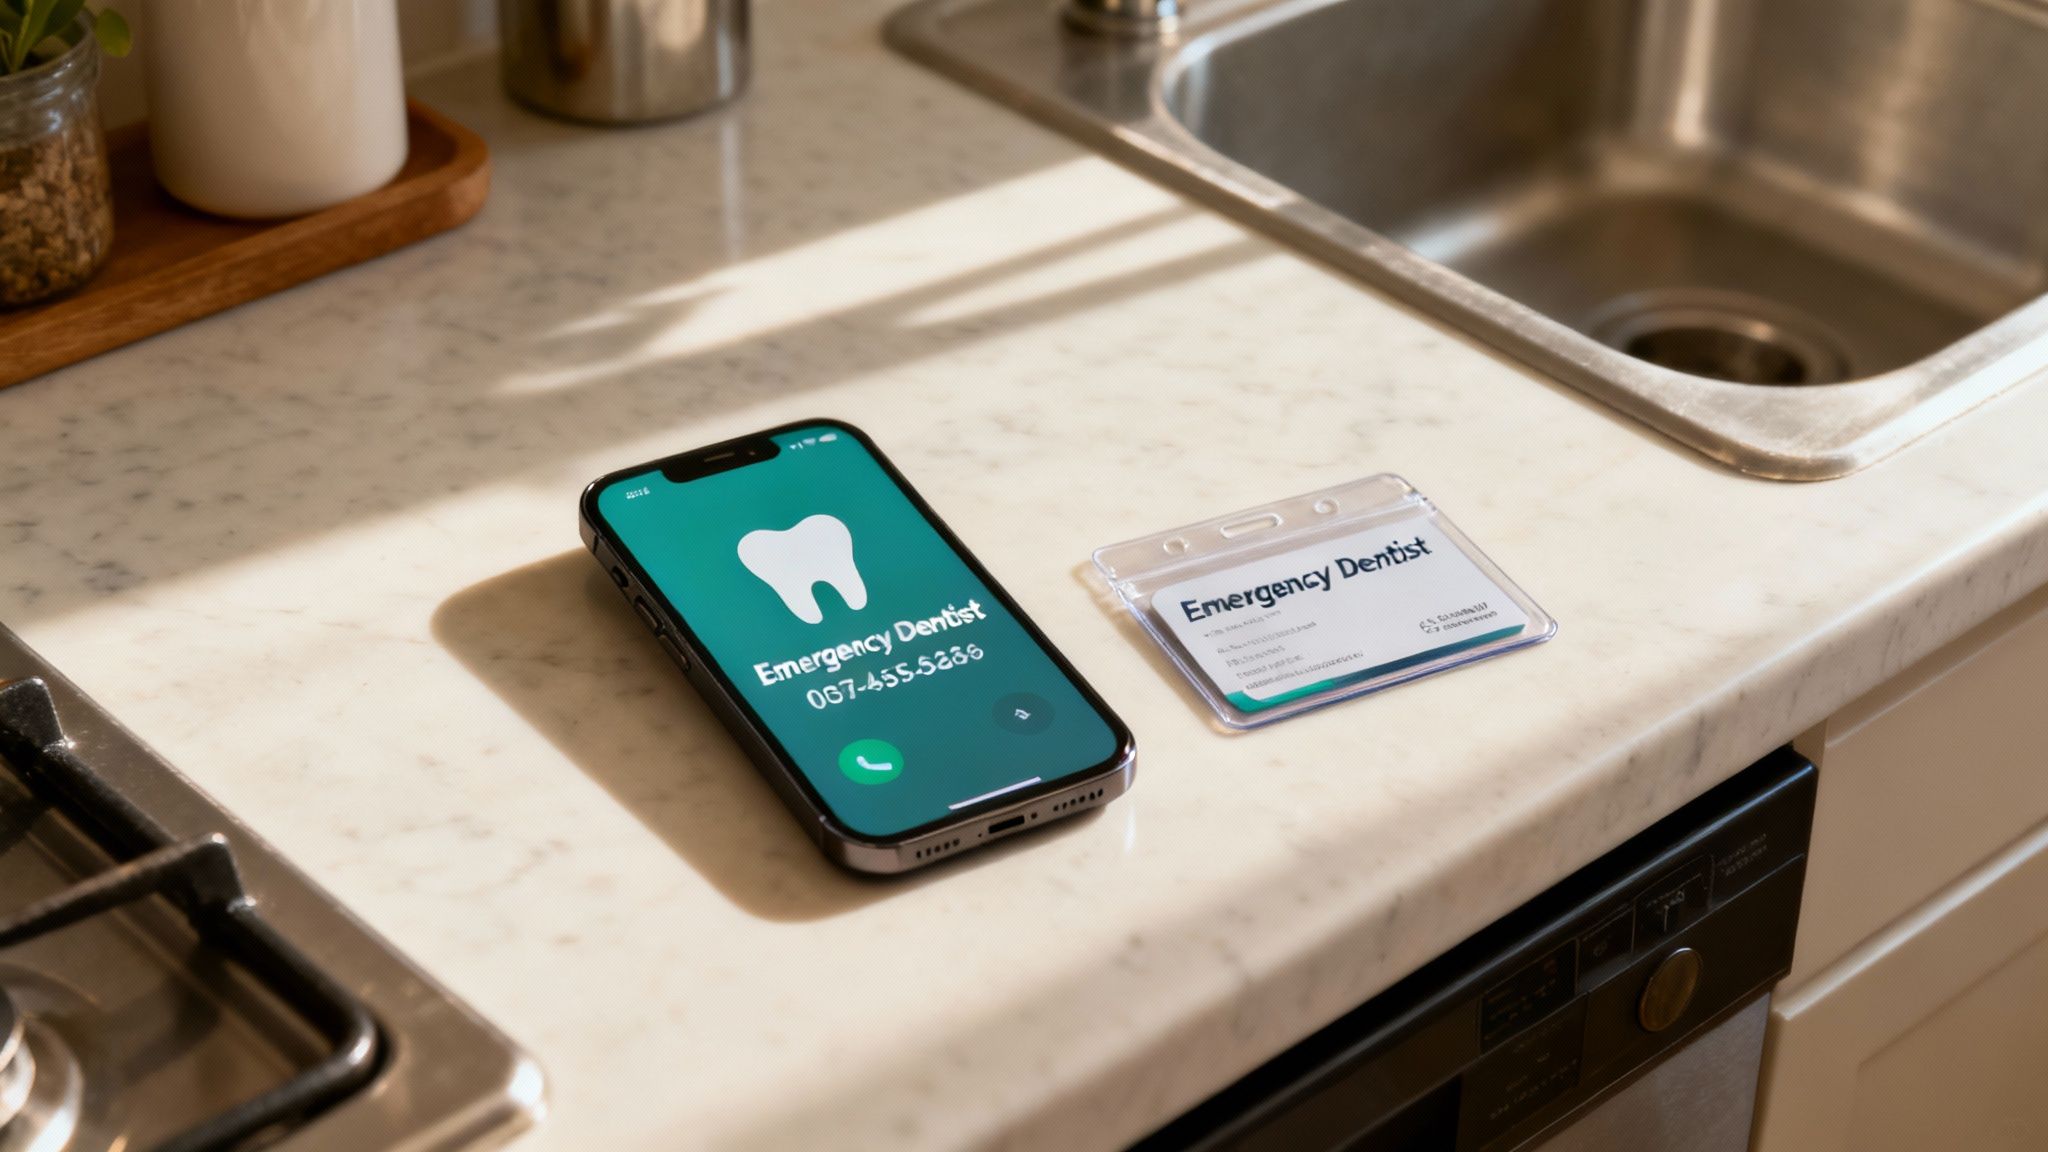
7. Emergency Dentist Contact Information and Telephone Resources
When a dental emergency like a knocked-out tooth happens, every second matters. You don’t want to be looking for a phone number. That’s why having contact information ready is a key part of the dental emergency checklist every Surprise family should have on hand. In a moment of panic, knowing exactly who to call can help you get care much faster.
This means having more than just your regular dentist’s number. You should also have a list of after-hours clinics and your dental insurance hotline. Knowing your dentist’s office has a reliable dental office answering service is also important for getting help quickly. Having this information ready turns chaos into a calm, effective response.
How to Use It Correctly
Creating and keeping an emergency contact list ensures you’re never caught off guard. For families in Surprise, AZ, here are some tips:
- Create a Master List: Make a physical list with our office number, the nearest 24-hour dental clinic, and your dental insurance hotline. Post it on your refrigerator.
- Program Your Phone: Save your emergency dentist’s number in your phone’s contacts under a clear name like “EMERGENCY DENTIST.”
- Make it Portable: Create a small, laminated card with these contacts to keep in your wallet or purse.
- Update Annually: Services and hours can change. Review and update your contact list once a year to make sure all the information is correct.
Key Insight: Having contact information is the first step; knowing when to use it is just as important. Some issues need immediate attention to save a tooth or stop an infection. To learn what counts as a true emergency, find out more about our same-day dental appointments and when to seek urgent care.
8. Cold Compress and Heat Therapy Application Tools
When dental trauma or a painful abscess happens, managing swelling and pain is a critical first step. Having both cold and heat therapy tools is an essential part of the dental emergency checklist every Surprise family should have on hand. These simple but effective tools help control swelling, numb pain, and promote healing before you can get professional treatment.
Cold therapy, like a reusable gel pack, narrows blood vessels to reduce swelling and numb the area, which is perfect right after an injury. Heat therapy, used later, increases blood flow, which helps relax muscles and speed up healing. Having both ready means you can respond correctly at any stage of a dental emergency.
How to Use Them Correctly
Knowing when to apply cold or heat is key for effective relief. Here are some guidelines for families in Surprise, AZ:
- Start with Cold: For the first 24-48 hours after an injury like a chipped tooth, apply a cold pack to the outside of your cheek. Use it for 20 minutes on, then 20 minutes off.
- Protect Your Skin: Always wrap ice packs in a thin towel. Applying them directly to the skin can cause an ice burn.
- Switch to Heat Later: After the first swelling goes down (usually after 48 hours), you can switch to a warm compress to ease soreness.
- Keep it Reusable: Reusable gel packs that can be frozen or microwaved are a great, money-saving addition to your kit.
Key Insight: The “20 minutes on, 20 minutes off” rule is standard in emergency medicine for a reason. It stops tissue damage from too much cold while still managing swelling. If pain and swelling continue for more than 48 hours, it’s a clear sign you need to contact us right away.
8-Item Family Dental Emergency Checklist Comparison
| Item | 🔄 Implementation Complexity | ⚡ Resource Requirements | ⭐ Expected Outcomes | 📊 Ideal Use Cases | 💡 Key Advantages / Tips |
|---|---|---|---|---|---|
| Topical Oral Anesthetic (Benzocaine 20%) | Low — topical, no training needed | Minimal — OTC tube, swabs | ⭐⭐⭐ — rapid, short-lived (15–30 min) pain relief | Short-term pain control while awaiting care; minor trauma | Apply with clean swab; avoid infants; follow directions |
| Dental First Aid Kit (Pre-assembled) | Low — organized, basic familiarity helpful | Moderate — multiple consumables; periodic replacement | ⭐⭐⭐ — broad temporary management across issues | Home/car/workplace for multi-symptom emergencies | All-in-one convenience; check expirations every 6 months |
| Sterile Gauze Pads & Hemostatic Agents | Low–Medium — technique (pressure) improves efficacy | Minimal — sterile gauze, hemostatic packets, dry storage | ⭐⭐⭐⭐ — effective bleeding control when applied correctly | Post-extraction bleeding, traumatic oral wounds | Apply firm pressure 15–20 min; moisten before removal |
| Over-the-Counter Pain Relievers (Ibuprofen/Acetaminophen) | Low — dosing knowledge required | Minimal — OTC tablets/liquids; label storage | ⭐⭐⭐⭐ — reliable analgesia; ibuprofen reduces inflammation | Moderate toothache, swelling, short-term pain control | Follow dosing limits; alternate for extended relief; note contraindications |
| Temporary Dental Filling Material (ZOE & alternatives) | Medium — mixing and placement technique required | Moderate — paste/powder kits, mixing tools, dry tooth | ⭐⭐⭐ — restores structure and soothes nerve temporarily | Lost filling, cracked tooth, exposed dentin | Clean/dry area first; harden before eating; see dentist within 48–72h |
| Saline Solution and Oral Rinse | Low — simple rinse/irrigation steps | Minimal — prepackaged saline or salt & water | ⭐⭐⭐ — reduces bacteria, soothes tissue; supports healing | Wound irrigation, debris removal, post-op rinsing | Rinse gently 3–4× daily; make fresh solution daily if homemade |
| Emergency Dentist Contact Info & Telephone Resources | Low — initial setup only | Minimal — phone/card, digital list; periodic updates | ⭐⭐⭐⭐⭐ — enables timely definitive care/access to services | After-hours crises, teledentistry triage, referral to clinics | Keep laminated card; program numbers; update annually |
| Cold Compress & Heat Therapy Tools | Low — follow timing protocols (cold/heat) | Minimal — gel packs, freezer/microwave or instant packs | ⭐⭐⭐⭐ — reduces swelling and pain (cold first 48h) | Facial swelling after trauma, jaw muscle tension, post-op care | Ice 20 min on/20 off first 48h; switch to heat after acute phase |
Your Next Step: Be Prepared with West Bell Dental Care
Dealing with a dental emergency can feel scary, but being prepared is your best tool. By putting together the items on this checklist, you are taking a big step to protect your family’s oral health. This isn’t just about having supplies; it’s about feeling confident and knowing what to do when a toothache or cracked tooth happens.
Remember, your at-home kit is meant to manage the situation until you can get professional care. Each item, from a pain reliever to a cold pack, plays a role in preventing more damage and providing quick relief. Your preparation turns a moment of panic into a problem you can handle.
If you’re in Surprise, AZ and dealing with tooth pain, swelling, or a dental injury, West Bell Dental Care is here to help—fast. Book an emergency appointment online in minutes or call our office for same-day care you can trust.
Frequently Asked Questions
1. What is considered a true dental emergency?
A true dental emergency includes severe, persistent tooth pain, a knocked-out tooth, heavy bleeding from the mouth, or swelling in your face or gums, which could be a sign of infection. If you are experiencing any of these, you should seek dental care right away.
2. Should I go to the ER or the dentist for a toothache?
For most dental issues like a toothache, cracked tooth, or lost filling, you should see a dentist first. Emergency rooms are not usually equipped to handle dental problems and can only provide pain medication. However, if you have swelling that makes it hard to breathe or swallow, you should go to the nearest ER immediately.
3. Does West Bell Dental Care offer same-day emergency appointments in Surprise?
Yes, we do. We understand that dental emergencies can’t wait, so we keep time available in our schedule for same-day emergency appointments for patients in Surprise, Sun City Grand, and nearby communities. Call our office as soon as your emergency happens.
4. How can I manage dental anxiety during an emergency visit?
We know dental emergencies can be scary. Our team at West Bell Dental Care is trained to be compassionate and reassuring. We also offer sedation options for anxious patients to help you feel calm and comfortable during your treatment.
5. What should I do if my child knocks out a permanent tooth?
Act quickly. Find the tooth and hold it by the crown (the chewing part), not the root. If it’s dirty, rinse it gently with milk or water, but don’t scrub it. Try to place it back in the socket. If you can’t, put it in a small container of milk and call our Surprise office immediately. The sooner you get here, the better the chance we can save the tooth.
Don’t wait for an emergency to find a dentist you can trust. Partner with West Bell Dental Care to protect your family’s smiles with both preventive and urgent care. Visit us online at West Bell Dental Care to learn more about our same-day emergency appointments or to schedule your next checkup today.